
Over time, hardwood floors can become scratched, dull, or worn, but that doesn’t mean they need to be replaced.
Over time, hardwood floors can become scratched, dull, or worn, but that doesn’t mean they need to be replaced. Refinishing your hardwood floors is a cost-effective way to restore their beauty and extend their lifespan. Whether you want to revive an old floor’s natural charm or change the stain color for a fresh new look, refinishing is a doable DIY project with the right tools, patience, and technique. This step-by-step guide will walk you through every detail of refinishing hardwood floors, from prepping the surface to applying the final coat of finish. Whether your floors are lightly worn and need a screen-and-recoat or heavily scratched and require full sanding, this guide will ensure a professional-quality finish.
Not all hardwood floors require full sanding. Depending on the condition, you may be able to refresh the surface without sanding to bare wood.
Full Sanding (Best for heavily scratched, stained, or discolored floors)
○ Floors that have deep scratches, worn finish, or uneven stain need to be
sanded down completely to bare wood.
○ This process removes the old finish, smooths out imperfections, and
prepares the wood for staining or sealing.
Screen-and-Recoat (Best for light scratches and dull finishes)
○ If your floor’s protective finish is worn but the wood underneath is still in
good condition, a screen-and-recoat might be enough.
○ This involves lightly buffing the floor with a sanding screen and applying a new layer of polyurethane.
Tip: If water soaks into the wood rather than beading on the surface, your floor
likely needs a full sanding and refinishing.
Remove all furniture, rugs, and decor from the room.
If refinishing baseboards or trim, remove them carefully with a pry bar.
Seal off doorways and vents with plastic sheeting and painter’s tape to prevent dust
from spreading.
Sweep or vacuum the floor to remove loose dirt and debris.
Tip: If you have nail heads sticking up, hammer them down before sanding.
Sanding removes the old finish, scratches, and imperfections, preparing the wood for
staining or sealing.
Sanding Steps
1. Start with coarse sandpaper (36 or 40 grit)
○ Attach it to a drum sander or orbital floor sander.
○ Sand in the direction of the wood grain, moving evenly across the room.
○ Keep the sander moving to avoid gouging the floor.
2. Repeat with medium grit (60-80 grit)
○ This smooths out the rough surface left by the coarse sanding.
3. Finish with fine grit (100-120 grit)
○ This preps the wood for staining or finishing.
4. Edge Sanding
○ Use an edge sander to sand along walls and corners where the drum sander
can’t reach.
○ Use hand scrapers for tight areas like under cabinets.
5. Vacuum and wipe down the floor
○ Use a shop vacuum followed by a tack cloth or microfiber mop to remove all
dust.
If there are gaps, cracks, or deep scratches, apply wood filler using a putty knife.
Let it dry completely before lightly sanding the area again.
Tip: Choose a wood filler that matches the species and color of your flooring.
If you want to change the color of your hardwood, now is the time to apply a stain.
Apply stain using a microfiber applicator or lint-free cloth.
Work in small sections, wiping off excess stain as you go.
Let the stain dry completely (usually 24 hours, depending on the product).
Tip: Always test stain on a scrap piece of flooring before applying it to the entire
floor.
Choose between oil-based or water-based polyurethane for your finish
Oil-Based Polyurethane:
○ More durable but takes longer to dry (24+ hours per coat).
○ Has a warmer, amber hue.
Water-Based Polyurethane:
○ Dries faster (4-6 hours per coat) and has less odor.
○ Provides a clearer, more natural finish.
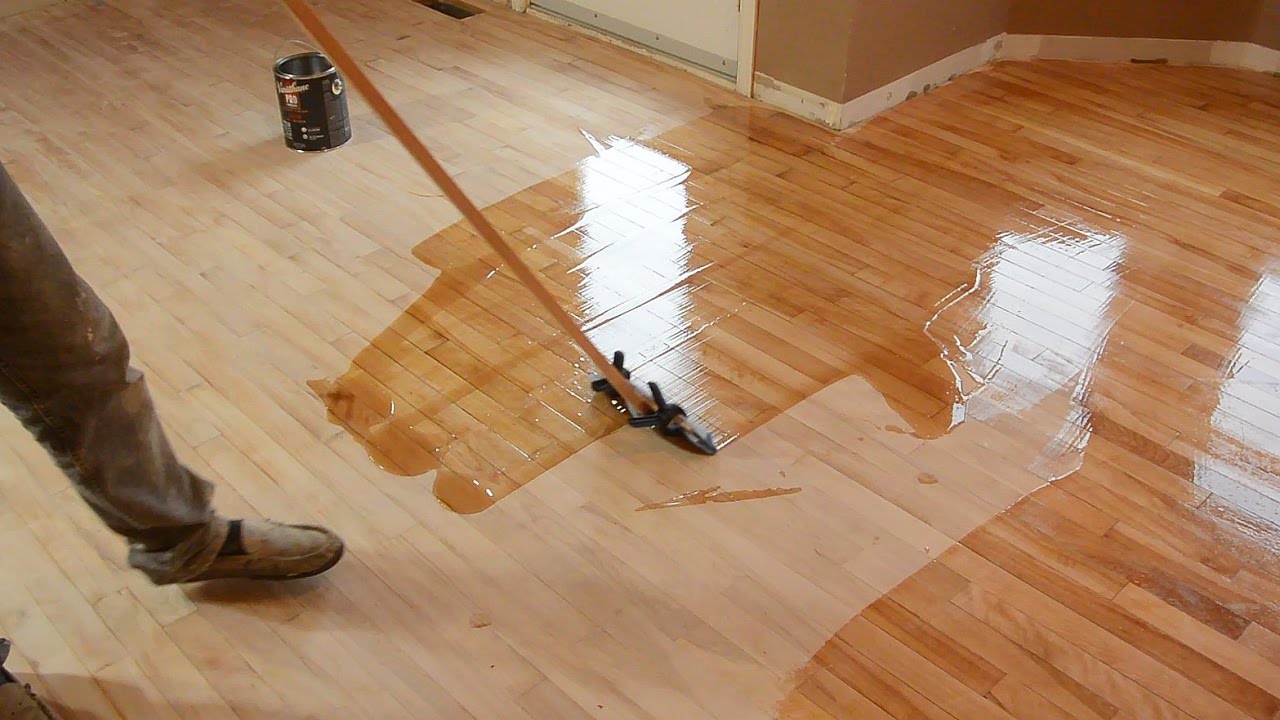
Applying the Finish
Use a microfiber roller or lambswool applicator to apply an even coat.
Work in long, even strokes, following the grain of the wood.
Let each coat dry completely before lightly sanding with 220-grit sandpaper.
Apply 2-3 coats for maximum durability.
Tip: Avoid heavy foot traffic for at least 48 hours after the final coat
Allow the finish to fully cure for 7 days before placing furniture back in the room.
Use felt pads on furniture legs to prevent scratches.
Avoid wet mopping for the first few weeks.
Tip: Use a hardwood floor cleaner instead of water-based cleaners to maintain
the finish.
Sanding unevenly – Move the sander at a steady pace and never leave it in one spot
too long.
Stain appearing blotchy – Always wipe off excess stain before it dries.
Bubbles in polyurethane – Apply finish slowly and evenly to avoid air bubbles.
Dust settling in finish – Vacuum the room before applying the final coat and avoid
drafts.
Polyurethane streaks or brush marks – Use a microfiber roller or lambswool
applicator for smooth results.
Refinishing hardwood floors is a cost-effective way to restore beauty and durability without replacing them. With proper sanding, staining, and finishing techniques, you can achieve a professional-quality result that lasts for years.
📢 Have any questions? Need professional hardwood floor refinishing instead of DIY?

Golden Flooring & Remodeling Company – Providing quality flooring, kitchen, and bathroom remodeling with expert craftsmanship and personalized service.